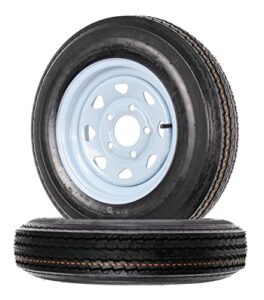
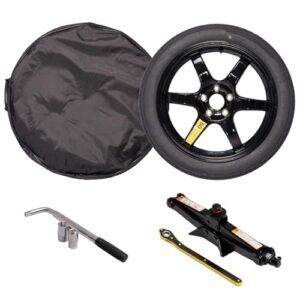
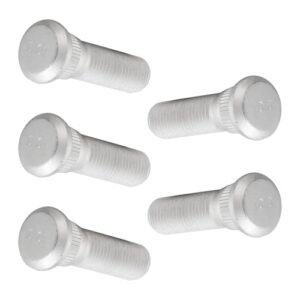
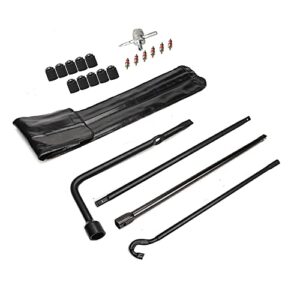
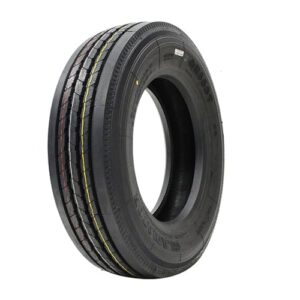
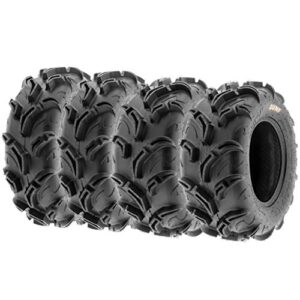
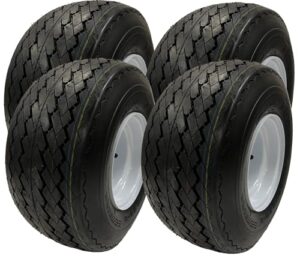
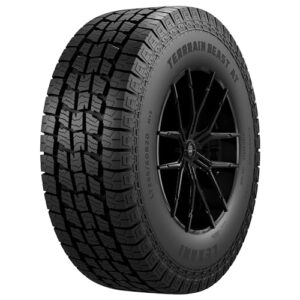
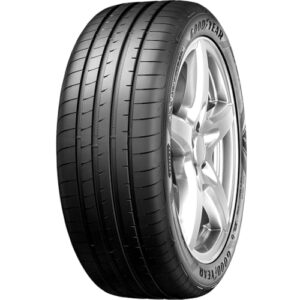
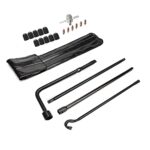
The easiest way to put a tire on a rim by hand is to use lubricant and tire irons. Ensure the tire is warm and pliable before attempting to mount it.
Mounting a tire onto a rim without professional equipment can be a daunting task, but with the right approach, it’s achievable. Being prepared is essential; you’ll need a well-lit workspace and the proper tools at hand. Using lubrication, such as soapy water, simplifies the process, reducing friction and allowing the tire to slide onto the rim more easily.
Tire irons or spoons are indispensable tools that help pry the tire over the rim’s edge. It’s important to exercise patience and use gradual, steady force to avoid damaging the tire or rim. Remember to always support the tire correctly and never force it, as this could result in personal injury or damage to the tire or rim.
Introduction To Manual Tire Mounting
Imagine a flat tire in the middle of nowhere with no service station in sight. That’s when mounting a tire by hand becomes more than a nifty trick; it’s a lifesaver. Manual tire mounting involves installing a tire onto a rim using only hand tools and physical effort. This skill not merely saves the day during emergencies but also grants independence from professional services for routine tire changes.
Benefits Of Knowing How To Mount Tires
Learn this, and you’ll unlock:
- Freedom to change tires anytime
- Money savings from avoiding service fees
- Peace of mind during unforeseen tire mishaps
When To Opt For Manual Installation
It’s best to choose manual installation:
- After buying new tires and aiming to avoid shop queues
- When stranded with a flat and no help is around
- If you prefer hands-on car maintenance
Required Tools And Materials
Mounting a tire onto a rim by hand is a hands-on task. To make this process smooth, having the right tools and materials is crucial. Let’s go through the essentials you’ll need to get the job done efficiently and safely.
Essential Tire Mounting Tools
Essential Tire Mounting Tools
- Tire iron or pry bar – to work the tire onto the rim.
- Lubricant – soap water or commercial tire lube helps the tire slip into place.
- Valve stem tool – for removing or installing the valve stem.
- Rubber mallet – to help seat the tire bead on the rim.
- Compressor – to inflate the tire once it’s on the rim.
Safety Equipment and Precautions
Safety Equipment And Precautions
Working with tires and rims can be dangerous. Always prioritize safety. Use the following equipment to protect yourself:
- Safety Glasses – to shield your eyes from debris.
- Work Gloves – to protect your hands and improve grip.
Keep bystanders away. Ensure the rim is securely supported. Never overinflate the tire.

Preparing The Tire And Rim
Ready to tackle changing a tire on your own? First, prepare the tire and rim. It sounds tough, but it’s simple. Here is what to do.
Cleaning And Inspection
A clean workspace is key. Start with a clean tire and rim. Dirt or debris can make this job harder and may cause issues.
- Wipe the rim with a rag to remove old tire residue.
- Clear any sharp objects from the bead area to avoid punctures.
- Inspect the rim for dents and the tire for damage.
Ensure all tiny stones and moisture are out of the rim.
Lubrication For Easier Mounting
Lubrication makes tire mounting simpler. It reduces friction and helps the tire slide onto the rim.
- Use a soap solution or an approved tire lubricant.
- Apply liberally to both the inner bead of the tire and the rim edge.
Never use oils or greases, as they can damage the tire.

Breaking The Bead On The Old Tire
Starting the process of changing a tire begins with a critical step: breaking the bead on the old tire. The bead is where the tire grips the rim. It must come loose before you replace a tire. Doing this by hand can seem daunting, but with the right approach, it’s manageable.
Techniques Without A Bead Breaker
Even without specialized tools, you can separate a tire from its rim. These techniques are easy to follow:
- Apply pressure: Put the tire flat on the ground. Stand on one side of the tire and use your body weight to push down.
- Use a lever: Insert a sturdy tool, like a crowbar or screwdriver, between the rim and tire. Pry the bead away carefully.
- Drive-over method: Run the edge of the tire over with a heavy vehicle slowly. Do this on a flat surface.
Safety Tips For Bead Breaking
Breaking a bead is straightforward, but it requires caution:
- Wear protective gear: Safety glasses and gloves are a must.
- Clear the area: Ensure no objects or people are close by.
- Check for damage: Inspect the tire and rim for cracks or weakness.
Removing The Old Tire
Removing the Old Tire is the first critical step for anyone looking to put a tire on a rim by hand. It requires careful execution to ensure you don’t damage the rim or the tire you might want to reuse. Following a systematic approach allows for a smoother installation of the new tire. Let’s dive into the process with some easy-to-follow steps.
Step-by-step Removal
- Deflate the tire completely by removing the valve stem core.
- Break the bead seal by pressing down on the tire edge.
- Use tire spoons to pry the tire edge over the rim.
- Repeat around the rim until one side is free.
- Flip and repeat on the other side to fully remove the tire.
Preventing Damage To Rim
- Place rim protectors to shield against scratches.
- Use minimal force with tire spoons to avoid rim bends.
- Lubricate the tire bead and rim edge to reduce friction.
Remember, patience is key. Take your time to avoid any hurry-induced errors that might harm the rim. With the right tools and a delicate touch, we can ensure a damage-free tire removal.

Mounting The New Tire
Mounting the New Tire is a crucial step in replacing a tire. It requires precision and careful handling. Doing it by hand doesn’t need to be a daunting task. With the right technique, it can be simple and satisfying.
Aligning The Tire With The Rim
The alignment process is straightforward but essential. Begin by checking that the tire and rim sizes match. Look for the tire directional arrows if applicable.
- Place the rim flat on a stable surface.
- Hold the tire at a 45-degree angle to the rim.
- Align the tire bead with the rim’s edge.
Manual Mounting Tricks
Manual mounting is a skill that can be mastered with practice. Here are some pro tips to get the tire on the rim with ease:
- Use lubrication. Soapy water works as a tire bead lubricant.
- Press the tire onto the rim, starting from one side.
- Keep the opposite side of the bead in the drop center of the rim.
- Use tire levers if necessary, being careful not to damage the rim or tire.
- Work in small sections until the tire pops into place.
With patience and the right approach, manual tire mounting becomes a hassle-free process.
Seating The Bead
Seating the bead is like giving your tire a firm handshake with its rim. It’s the moment the edges of the tire cling tight to the rim. Without a proper seat, the tire might not hold air or could come off while driving. Let’s explore how to make this crucial connection by hand, ensuring a safe and smooth ride every time.
Achieving A Proper Seal
To achieve a proper seal, first ensure the tire and rim are clean. Grit and grime can prevent a tight fit. Apply a lubricant, such as soapy water or a tire-specific product, along the edge of the tire bead. This makes slipping the rubber onto the rim much easier. Carefully push the bead over the rim edge all around the tire. Use hand force or a tire lever, being careful not to pinch the tire. Once the tire pops onto the rim, inspect it carefully. The bead should look even all around the tire, ready for inflation.
Troubleshooting Bead Seating Issues
Sometimes, getting that seal right takes a few tries. If air escapes and the tire won’t pop into place, don’t worry. Here are steps to troubleshoot:
- Ensure the tire is centered on the rim.
- Check for any obstructions like dirt or debris.
- Reapply lubricant to ease the tire onto the rim.
- Inflate the tire slowly and listen for a series of pops indicating the bead is seating.
- Deflate and reinflate if necessary.
For tough cases, it might be necessary to strap the tire’s circumference to force the bead into the rim as you inflate. Should these tips not yield results, seeking professional help is the next step. A proper seal is key for your safety on the road.
Inflating The New Tire
Inflating the New Tire is a key step after placing a tire on a rim by hand. A properly inflated tire ensures a safe and smooth ride. Here, we will go through simple techniques to inflate your new tire correctly.
Correct Inflation Techniques
Follow these steps to inflate your tire to the right pressure:
- Locate the valve stem on your tire.
- Remove the cap and attach a tire pressure gauge to check initial pressure.
- Use an air compressor to fill the tire.
- Fill slowly and periodically check the pressure gauge.
- Stop inflating once you reach the recommended PSI (Pounds per Square Inch).
- Double-check the pressure and adjust if necessary.
- Replace the valve cap tightly to prevent air from escaping.
Checking For Leaks
Once inflated, ensure there are no leaks:
- Listen for any hissing sounds around the valve area.
- Apply soapy water to the valve stem. Bubbles indicate a leak.
- Check the tire’s surface for any punctures or damage.
- Roll the tire and observe for consistent shape.
- Take action if you find any leaks. A patch kit or professional help may be needed.
Finishing Touches
Finishing touches on tire installation are crucial for a safe and smooth ride. After wrestling the tire onto the rim, these final steps ensure everything is set perfectly. Let’s balance and install the tire correctly.
Balancing The Tire
Properly balanced tires prevent vibrations and extend the life of your tires. Follow these easy steps for a balanced drive:
- Place the tire on a balancing machine.
- Spinning the tire reveals weight imbalances.
- Attach small weights to the rim to counterbalance.
- Spin again to check if additional adjustments are necessary.
Balance check and adjustment ensure a smooth ride.
Installing The Tire On Your Vehicle
Now, fit the tire onto your car with these simple steps:
- Lift your vehicle using a jack.
- Line up the rim with the wheel studs.
- Secure the tire by hand-tightening the nuts.
- Lower the car slightly and tighten again with a wrench.
- Fully lower the vehicle and perform a final tightening.
These actions assure safety and readiness for the road.
Tips For Longevity And Maintenance
Proper care for your tire and rim can make a big difference. A tire that fits well on a rim can last longer. Handling a tire with care is key. This can help you to get the most out of your tire. Here are tips to keep your tires running smoothly.
Regular Tire Checks
Regular checks keep tires in good shape. Check your tire pressure once a month. Use a gauge for accuracy. Look for wear patterns too. Uneven wear means trouble. Rotate your tires as needed. This helps them wear evenly.
Keep an eye on tire treads. Tread depth affects grip. Use a tread depth gauge. Or, try the penny test. If you can see the top of Lincoln’s head, it’s time for new tires.
Remember to check for damage. Small cuts can lead to big problems. Inspect the sidewalls as well. Bulges or blisters are a bad sign.
When To Seek Professional Help
Not all tire jobs are DIY. Sometimes, you need a pro. If you notice vibrations, get help. It might be a balance issue. Poor alignment is another red flag. It can cause faster wear.
If you spot cord or metal, it’s serious. Don’t wait. Professional repair or replacement is a must. Always get professional help if you’re unsure.
Lastly, don’t forget to register your tires with the manufacturer. This can alert you to recalls. And it often extends your warranty.
Troubleshooting Common Problems
When putting a tire on a rim by hand, issues sometimes get in the way of a smooth installation. Knowing how to tackle these problems ensures a hassle-free experience. Below, find practical tips for overcoming obstacles you might face during this process.
Dealing With Stubborn Tires
Stubborn tires don’t easily slip onto rims. The following steps should ease the struggle:
- Ensure proper tire size. A mismatch leads to problems.
- Lubricate the tire edges. Soapy water works wonders.
- Use tire levers carefully. They assist without causing damage.
- Keep tire and rim clean. Debris creates resistance.
- Warm up the tire. Heat makes rubber more flexible.
Addressing Potential Safety Issues
Putting a tire on a rim involves risks. Stay safe with these tips:
- Wear gloves and eye protection. They guard against accidents.
- Inspect tools for damage. Broken tools threaten safety.
- Never force the tire. Excessive force can cause harm.
- Check the rim for sharp edges. Smoothen them to prevent injury.
- Work in a stable area. A steady surface prevents slips.
Conclusion And Summary
Putting a tire on a rim by hand might seem tough, but it’s doable.
Recap Of Key Points
- Prepare your workspace: Clean, flat surface with no distractions.
- Gather the tools: Rim, tire, lubricant, and safety gear.
- Steps to mount: Lubricate tire beads, position the tire, and push onto the rim.
- Inspect your work: Make sure tire sits evenly on the rim.
- Air inflation: Inflate slowly and check the alignment.
Encouragement For Diy Enthusiasts
Don’t be scared to try new skills. Your hands are more capable than you think. With patience and practice, you can master changing a tire. Save money and feel proud by doing it yourself. Wear your handiwork as a badge of honor!

Frequently Asked Questions
How Do You Manually Put A Tire On A Rim?
Ensure the tire bead and rim edge are clean. Lubricate the bead and rim. Position the tire onto the rim. Use tire levers to work the bead over the rim edge. Inflate the tire carefully to seat the bead.
Can You Mount A Tire Without A Machine?
Yes, you can mount a tire without a machine using manual tools like tire irons, a pry bar, and lubricant, but it requires skill and physical strength.
How Do You Seal A Tire On A Rim At Home?
Deflate the tire completely. Clean the bead and rim edge to remove debris. Apply a bead sealant to the rim edge. Inflate the tire to press the bead onto the sealant. Check the seal and adjust as necessary.
How Do You Seat A Tire On A Rim?
Mount the tire onto the rim, ensuring it’s centered. Lubricate the bead and rim edge with soapy water. Inflate steadily, listening for pops as the bead seats. Stop inflating once the tire is fully seated and inspect for even seating around the rim.
Conclusion
Changing a tire can be a daunting task, but it becomes much simpler with the right approach. Our step-by-step guide has demonstrated the easiest way to mount a tire onto a rim by hand. Remember that practice makes perfect. So, grab your tools and give it a try – you’ll soon be changing tires like a pro, saving time and money in the process.
Stay safe and ready for the road!


