Balancing tires at home is possible with the right tools. It saves money and time.
Tire balancing is crucial for a smooth ride and tire longevity. Imbalanced tires can cause vibrations, uneven wear, and even damage your vehicle over time. While many people rely on professionals for this task, you can do it yourself with some basic knowledge and tools.
This guide will help you understand the steps involved in balancing your tires at home. From identifying the signs of imbalance to using the right equipment, you’ll learn everything you need to achieve a smooth and safe driving experience. Let’s dive in and see how you can take tire balancing into your own hands!

Benefits Of Diy Tire Balancing
Balancing tires at home offers several benefits. It’s not just about saving money. There are other advantages too. Let’s explore the benefits of DIY tire balancing.
Cost Savings
DIY tire balancing can save you a lot of money. Professional services charge fees for balancing tires. These costs add up over time. By doing it yourself, you only pay for the tools. These tools can be used multiple times. This makes the initial investment worth it. You can balance your tires whenever needed without extra costs.
Convenience
Balancing tires at home is very convenient. You don’t need to schedule appointments. No waiting in line at the service center. You can do it at your own pace. This is especially useful during busy times. You can also ensure the job is done right. You have control over the process. This can give you peace of mind. Plus, it’s a valuable skill to learn. DIY tire balancing makes you more self-reliant.
Essential Tools And Equipment
Balancing tires at home requires a few essential tools. These include a jack, tire balancer, and wheel weights. Proper equipment ensures smooth and safe driving.
Balancing tires at home requires some essential tools and equipment. Without the right tools, the process can be challenging and time-consuming. Having the proper tools ensures accurate and safe tire balancing. This section will cover the necessary tools and some optional ones that can make the job easier.
Required Tools
To balance tires at home, you need some basic tools. Here are the must-have items:
1. Tire Balancer: This device helps you find the heavy spots on the tire.
2. Wheel Weights: These weights are used to balance the tire.
3. Tire Iron: You need this to remove and replace the tire.
4. Jack and Jack Stands: These are essential for lifting and holding the vehicle.
5. Lug Wrench: This tool helps you remove and tighten the lug nuts.
These tools are essential for the tire balancing process. They ensure accuracy and safety.
Optional Tools
Some optional tools can make the job easier:
1. Digital Tire Pressure Gauge: This tool ensures your tires have the correct pressure.
2. Torque Wrench: It helps you apply the correct torque to the lug nuts.
3. Magnetic Bubble Balancer: An alternative to the traditional tire balancer.
4. Work Gloves: These protect your hands during the process.
5. Chalk or Marker: Useful for marking the heavy spots on the tire.
These optional tools are not necessary but can save time and effort. They add convenience and precision to the tire balancing process.
Pre-balancing Preparations
Before you balance your tires at home, some preparations are essential. These steps help ensure you do the job correctly. In this section, you’ll learn how to inspect your tires and clean the wheels.
Inspecting The Tires
First, you need to inspect your tires. Look for any visible damage. This includes:
- Cracks
- Bulges
- Uneven wear
Use a tire gauge to check the tire pressure. Make sure all tires have the correct pressure. Refer to your car’s manual for the recommended PSI.
Rotate the tires slowly and look for any irregularities. If you find any major issues, you may need to replace the tire.
Cleaning The Wheels
Next, clean the wheels thoroughly. Dirt and debris can affect the balance. Use a brush and soapy water to scrub the wheels. Pay attention to:
- The wheel surface
- The inside of the rim
- The tire bead
Rinse off the soap with clean water. Dry the wheels with a clean cloth. Ensure no moisture remains. This prevents rust and further issues.
In addition, inspect the wheel weights. Make sure they are securely attached. Loose weights can throw off the balance. If needed, replace them with new ones.
Removing The Tires
Balancing your tires at home can save you money and time. The first step in this process is removing the tires. This task might seem daunting, but with the right tools and a bit of patience, you can do it yourself. Let’s break it down into simple steps.
Lifting The Vehicle
Before you can remove the tires, you need to lift the vehicle. Use a car jack to elevate the car. Make sure the ground is flat and the handbrake is engaged. Position the jack under the car’s frame, near the tire you want to remove. Slowly raise the car until the tire is off the ground. Place jack stands under the car for extra safety. This prevents the car from falling while you work.
Taking Off The Tires
Once the car is lifted, you can take off the tires. Use a lug wrench to loosen the lug nuts. Turn the wrench counterclockwise. After loosening all the lug nuts, remove them completely. Carefully pull the tire off the wheel hub. Set the tire aside. Repeat these steps for each tire you need to balance.
Balancing The Tires
Balancing tires at home involves simple steps. First, lift the car and remove the tires. Next, use a bubble balancer to check the balance. Finally, add weights to even out any imbalance.
Balancing the tires at home can be a rewarding task. It ensures a smooth ride and extends the life of your tires. With the right tools and some patience, you can get it done. This guide walks you through the process step by step.
Mounting The Tires
First, secure your car on a flat surface. Use a jack to lift the car and remove the tires. Clean the wheels and tires thoroughly. Any dirt or debris can affect the balancing process. Mount the tires back onto the wheels. Ensure they fit snugly and are properly aligned. Tighten the lug nuts in a crisscross pattern to ensure even pressure.
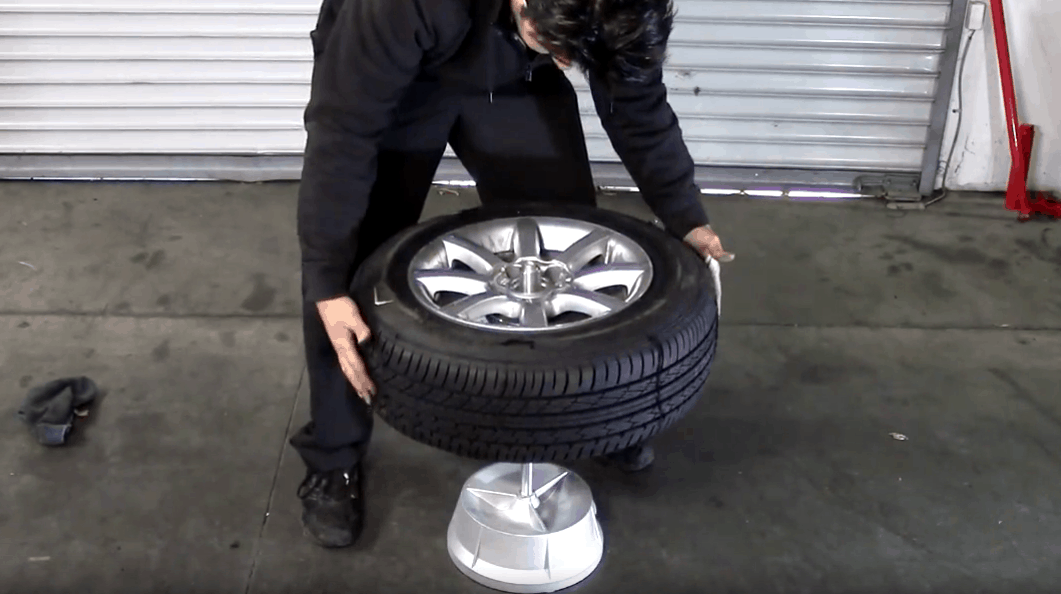
Using A Balancing Machine
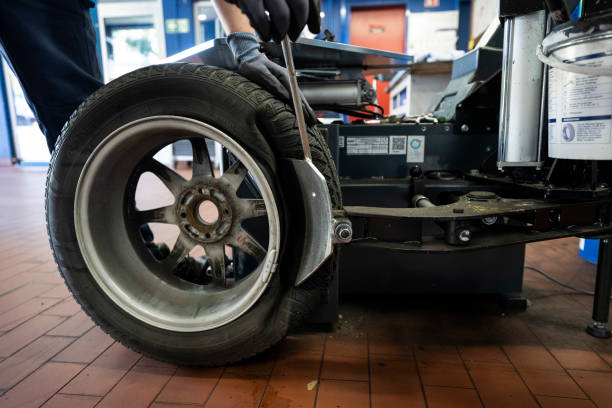
Next, use a tire balancing machine. Place the tire on the machine’s spindle. Follow the machine’s instructions for setup. The machine will spin the tire to find any imbalances. It will indicate where to place the weights. Attach the weights as directed. Recheck the balance to ensure accuracy. Repeat the process for each tire. Make sure each tire is balanced before remounting them on the car.
Reinstalling The Tires
Reinstalling the tires is the final step to balance your tires at home. This process ensures your vehicle is ready for the road. You will need to follow a few important steps to complete this task correctly.
Securing The Tires
First, carefully place the tire onto the wheel hub. Align the bolt holes with the wheel studs. Hand-tighten the lug nuts in a crisscross pattern. This helps the tire sit evenly on the hub. Use a lug wrench to tighten the nuts further. Ensure they are snug but not overly tight. You will torque them properly later.
Lowering The Vehicle
Next, slowly lower your vehicle using a jack. Lower it until the tire touches the ground but doesn’t bear the full weight. Now, use a torque wrench to tighten the lug nuts. Follow the crisscross pattern again. Check the vehicle manual for the proper torque specification. Lower the vehicle completely to the ground once all nuts are secure.
Post-balancing Checks
Balancing tires at home can save money. But post-balancing checks are essential to ensure safety. These checks verify that the tires are balanced correctly.
Test Drive
Start with a short test drive. Drive at different speeds. Pay attention to how the car feels. If you feel vibrations, the tires may still be unbalanced. Smooth driving means the balancing was successful.
Rechecking The Balance
After the test drive, recheck the balance. Use the same tools you used before. Verify each tire again. Small adjustments might be needed. This step ensures the balance is perfect. Double-checking helps avoid future problems.

Frequently Asked Questions
What Tools Do I Need To Balance Tires At Home?
You need a jack, tire balancer, weights, and a lug wrench.
How Do I Know If My Tires Are Unbalanced?
Look for vibrations, uneven tire wear, and poor handling.
Can I Balance Tires Without Professional Help?
Yes, you can balance tires at home with the right tools.
How Often Should I Balance My Tires?
Balance your tires every 5,000 to 6,000 miles or when you feel vibrations.
Conclusion
Balancing your tires at home can save you time and money. Follow the steps carefully and ensure tools are ready. Check tire pressure and wear regularly. Rotate your tires every few months to keep them balanced. Stay safe by taking your time and double-checking your work.
If unsure, seek professional advice. Regular maintenance leads to smoother rides and longer tire life. Happy driving!


