To install tubeless tires, remove the wheel and tire, then apply a tubeless valve. Seal the tire onto the rim.
Tubeless tires offer a smoother ride and fewer punctures compared to traditional tires. They are becoming increasingly popular among cyclists for their reliability and performance. Installing tubeless tires may seem challenging, but the process is straightforward with the right tools.
You need a tubeless-ready wheel, tire, sealant, and a pump. Proper installation ensures a secure seal, improving your bike’s efficiency and comfort. This guide will help you understand the step-by-step process, ensuring you can install tubeless tires confidently and enjoy a hassle-free ride.

Introduction To Tubeless Tires
Tubeless tires are a game changer for cyclists. They offer a smoother ride with fewer punctures. This guide will help you understand and install tubeless tires. Let’s dive into the basics of tubeless tires.
Benefits Of Going Tubeless
Tubeless tires have many benefits. Here are some of the top reasons:
- Fewer Punctures: No inner tube means fewer chances of getting a flat tire.
- Better Traction: Lower pressure allows for better grip on the road.
- Lighter Weight: Removing the inner tube reduces the overall weight.
- Smoother Ride: Tubeless tires absorb bumps better.
Basic Components Required
Installing tubeless tires requires specific components. Here’s a list of what you’ll need:
| Component | Description |
|---|---|
| Tubeless Tire | A special tire designed for tubeless systems. |
| Tubeless Valve | A valve that fits into the rim to seal air. |
| Rim Tape | Tape to seal the spoke holes in the rim. |
| Sealant | Liquid that fills small punctures automatically. |
| Air Compressor | Helps to seat the tire bead onto the rim quickly. |
Choosing The Right Tubeless Tires
Choosing the right tubeless tires is crucial for a smooth ride. The right tires ensure better grip and durability. Let’s explore key factors and popular brands.
Factors To Consider
- Terrain: Choose tires based on the terrain you’ll ride.
- Width: Wider tires offer more grip but can be heavier.
- Durability: Look for puncture-resistant materials.
- Weight: Lighter tires can improve speed but may wear out faster.
- TPI (Threads Per Inch): Higher TPI means a more flexible and supple tire.
Popular Tubeless Tire Brands
| Brand | Features |
|---|---|
| Schwalbe | Known for durability and performance in rough terrains. |
| Maxxis | Offers a wide range of sizes and excellent grip. |
| Continental | Famous for their puncture resistance and speed. |
| Michelin | Provides great balance between performance and comfort. |
Tools And Materials Needed
Installing tubeless tires can seem challenging. With the right tools and materials, it’s a straightforward process. This guide will cover all the essentials needed for a successful installation.
Essential Installation Tools
To start, you’ll need some basic tools. These will help you install your tubeless tires smoothly.
- Tire Levers: These help remove the old tire.
- Air Compressor or Floor Pump: You need this to seat the tire.
- Rag or Cloth: Keep things clean during installation.
- Soapy Water: This helps seat the tire easier.
Sealants And Valves
Sealants and valves are crucial for tubeless tire installation. They ensure your tires hold air and seal properly.
| Item | Purpose |
|---|---|
| Tubeless Sealant | Seals punctures and keeps the tire airtight. |
| Tubeless Valves | Allows air to enter but keeps the sealant in. |
With these tools and materials, you’re ready to install your tubeless tires. Remember to check each item off your list before starting.
Preparing The Rim And Tire
Preparing the rim and tire is crucial for a successful tubeless tire installation. This ensures a secure fit and prevents air leaks. Follow these steps to get your rim and tire ready.
Cleaning The Rim
Start by thoroughly cleaning the rim. Use a clean cloth and rubbing alcohol. This removes dirt, grease, and old sealant. A clean rim ensures a proper seal.
- Wipe the rim with a clean, dry cloth.
- Apply rubbing alcohol to another cloth.
- Scrub the rim to remove all residues.
- Let the rim dry completely before proceeding.
Inspecting Tire For Damages
Check the tire for any damages. Look for punctures, cuts, or abrasions. Damaged tires can lead to air leaks or blowouts.
- Hold the tire under good lighting.
- Examine the tread and sidewalls.
- Look for any visible damage or wear.
- Replace the tire if you find any significant issues.
After ensuring the rim is clean and the tire is undamaged, you can proceed with installing the tubeless tire. Following these steps carefully will help achieve a secure and reliable setup.
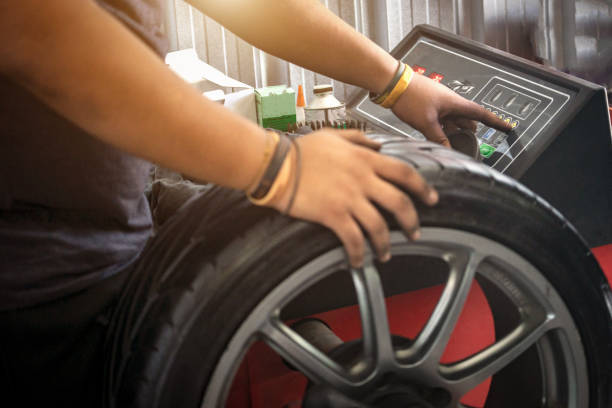
The Installation Process
Installing tubeless tires can seem daunting at first. With the right steps, it becomes straightforward. Follow this guide to make the installation process smooth and easy.
Mounting The Tire Onto The Rim
Start by ensuring the rim tape is properly installed. This prevents air leaks. Next, partially inflate the tire to give it shape. This helps in mounting it onto the rim.
- Align the tire with the rim.
- Push one side of the tire bead into the rim well.
- Work around the rim, pushing the bead into place.
- Once one side is in, repeat for the other side.
Use tire levers if necessary. Be careful not to damage the rim or the tire.
Seating The Bead
With the tire mounted, the next step is seating the bead. Proper seating ensures an airtight seal.
- Inflate the tire to a low pressure, around 15 psi.
- Check that the bead is uniformly seated on both sides.
- Increase the pressure gradually to the recommended level.
- Listen for pops indicating the bead is seating correctly.
If the bead does not seat, deflate and try again. Sometimes, soapy water can help by reducing friction.
Once seated, check for air leaks. Add sealant if needed to seal any small gaps.
With these steps, your tubeless tires should be ready to ride. Enjoy the smooth, puncture-free experience.
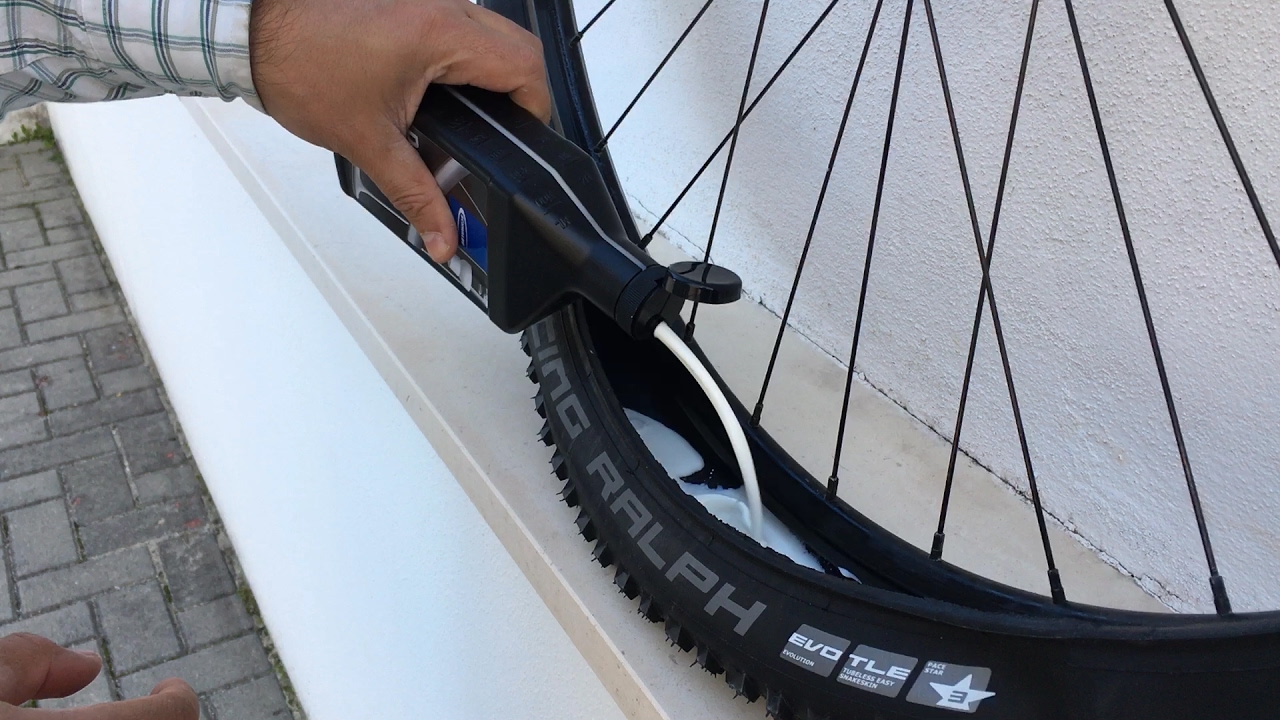
Inflating And Sealing The Tire
Installing tubeless tires can seem daunting. Inflating and sealing the tire is a crucial step. This process ensures your tire is ready for the road.
Achieving The Correct Pressure
Proper inflation is vital. Use a high-volume pump or air compressor. Begin by attaching the pump to the valve. Pump air until the tire starts to seat.
- Check the tire’s sidewall for recommended pressure.
- Use a pressure gauge to monitor the air pressure.
- Adjust the air pressure to the recommended PSI.
Over-inflation can cause the tire to burst. Under-inflation can lead to poor performance. Always aim for the correct pressure.
Checking For Leaks
Ensuring a proper seal is essential. Check for leaks immediately after inflation.
- Mix soap and water in a spray bottle.
- Spray the mixture around the tire bead and valve.
- Look for bubbles forming, indicating a leak.
If you find bubbles, the tire is leaking. Deflate the tire and reseat the bead. Repeat the inflation process.
| Action | Steps |
|---|---|
| Inflate Tire | Use a pump, check pressure, adjust to correct PSI |
| Check for Leaks | Spray soapy water, look for bubbles, reseat if necessary |
A properly sealed tire will hold air. This ensures safety and performance on the road.
Frequently Asked Questions
How To Install Tubeless Tires At Home?
Clean the rim and tire. Apply tubeless tape to the rim. Install the valve stem. Mount the tire. Inflate and check for leaks.
Are Tubeless Tires Harder To Put On?
Yes, tubeless tires can be harder to install. They require precise alignment and a strong seal to prevent air leaks.
Can You Run Tubeless Tires Without Sealant?
You can run tubeless tires without sealant, but it’s not recommended. Sealant prevents air leaks and seals small punctures.
How Do You Convert Tubed Tires To Tubeless?
To convert tubed tires to tubeless, remove the tube, install a tubeless valve, and seal the rim. Ensure the tire bead seats properly. Add tubeless sealant and inflate the tire.
What Tools Are Needed For Tubeless Tire Installation?
You need tire levers, sealant, an air compressor, and a tubeless-compatible wheel and tire.
Conclusion
Mastering tubeless tire installation ensures smoother rides and fewer punctures. Follow the steps carefully for optimal results. Regularly check for leaks and maintain proper tire pressure. Enjoy the benefits of increased performance and reliability. Share your experience and tips to help others.
Happy cycling!