To fix a tire bead leak, clean the bead area and apply a bead sealer. Reinflate the tire and check for leaks.
A tire bead leak can cause constant air loss, affecting your vehicle’s performance and safety. This issue often arises from dirt, debris, or corrosion around the tire’s bead area, where the tire meets the rim. Fixing a tire bead leak is a straightforward process that can save you from frequent trips to the gas station for air.
Identifying the leak early and addressing it promptly can extend the life of your tire. Proper maintenance ensures a safer, smoother ride. Understanding how to fix a tire bead leak can help you maintain your vehicle’s reliability and efficiency.
Identifying Tire Bead Leaks
Identifying tire bead leaks is crucial for maintaining your vehicle’s safety. A tire bead leak occurs at the point where the tire meets the rim. Recognizing the signs early can prevent bigger problems. Below, we discuss how to identify these leaks.
Common Symptoms
- Frequent Loss of Air Pressure: If your tire loses air often, it may have a bead leak.
- Visible Bubbles: Check for bubbles around the tire edge. This indicates a leak.
- Tire Creaking Sounds: Strange noises when driving can signal a bead issue.
- Tire Pressure Light: The light on your dashboard could mean a bead leak.
Inspection Methods
There are several ways to inspect for tire bead leaks. Follow these steps:
- Visual Inspection: Look closely at the rim and tire junction.
- Soapy Water Test: Mix soap and water. Apply it to the tire edge. Watch for bubbles.
- Submerge the Tire: If possible, dunk the tire in water. Look for escaping air bubbles.
- Listen Carefully: A hissing sound often indicates a bead leak.
By identifying these symptoms and using these inspection methods, you can quickly diagnose a tire bead leak. This helps ensure your vehicle remains safe and efficient.

Essential Tools And Materials
Fixing a tire bead leak is essential for maintaining tire integrity. To ensure you have everything ready, you need the right tools and materials. This section will guide you on the essential tools and materials required for the task.
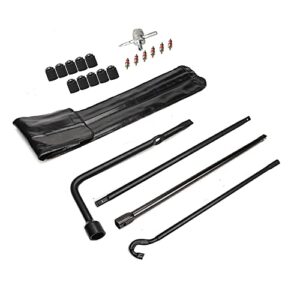
Tools You’ll Need
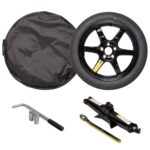
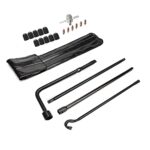
- Tire Iron – Used to remove and reinstall the tire.
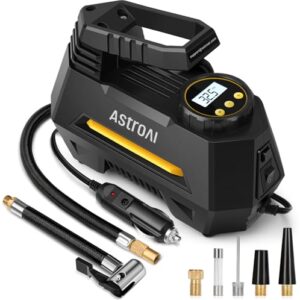
- Air Compressor – To inflate the tire once fixed.
- Spray Bottle – For applying soapy water to locate the leak.
- Bead Breaker – Helps in separating the tire from the wheel.
- Torque Wrench – Ensures nuts and bolts are properly tightened.
Recommended Materials
- Soapy Water – Helps in identifying the exact location of the leak.
- Rubber Cement – Used to seal the leak and ensure it holds.
- Patching Kit – Contains patches to cover and seal the hole.
- Tire Sealant – Provides an additional layer of protection.
- Valve Core Tool – For removing and tightening the valve core.
| Tool | Purpose |
|---|---|
| Tire Iron | Remove and reinstall the tire |
| Air Compressor | Inflate the tire |
| Spray Bottle | Apply soapy water |
| Bead Breaker | Separate tire from wheel |
| Torque Wrench | Tighten nuts and bolts |
Preparing The Tire
Fixing a tire bead leak requires careful preparation. Start by gathering the necessary tools and ensuring a safe environment. This section will guide you through the process of preparing the tire for repair.
Safety Precautions
- Wear Safety Gear: Wear gloves and safety glasses.
- Use a Jack Stand: Ensure the car is stable with a jack stand.
- Work in a Ventilated Area: Work in a well-ventilated space to avoid inhaling fumes.
Tire Removal Steps
- Loosen the Lug Nuts: Use a wrench to loosen the lug nuts slightly.
- Lift the Vehicle: Use a jack to lift the car off the ground.
- Remove the Lug Nuts: Fully remove the lug nuts and set them aside.
- Remove the Tire: Carefully pull the tire off the wheel hub.
- Inspect the Tire: Check the tire for any visible damage or debris.
Preparing the tire is crucial for a successful repair. Follow these steps to ensure a smooth and safe process.

Cleaning The Bead Area
Fixing a tire bead leak starts with a clean bead area. Dirt and debris can cause leaks. Proper cleaning ensures a good seal.
Importance Of Cleaning
The bead area is where the tire meets the rim. Dirt and debris here can cause air to escape. A clean bead area ensures a tight seal. Without cleaning, even new tires can leak.
Cleaning removes obstacles that block a good seal. It helps the tire fit snugly on the rim. This prevents future leaks and improves safety.
Effective Cleaning Techniques
Use these steps to clean the bead area well:
- Remove the tire from the rim.
- Check the bead area for dirt and debris.
- Use a wire brush to scrub the bead area. Scrub gently to avoid damage.
- Wipe the area with a clean cloth. Remove all loose particles.
- Apply a bead sealer if needed. This helps create a tight seal.
A clean bead area is key to stopping leaks. Follow these steps for best results.
| Step | Action |
|---|---|
| 1 | Remove the tire from the rim |
| 2 | Check the bead area |
| 3 | Scrub with a wire brush |
| 4 | Wipe with a clean cloth |
| 5 | Apply bead sealer if needed |
Keep your tires clean for a safer ride. Proper cleaning prevents many problems.
Applying Sealant
Fixing a tire bead leak can be straightforward with the right sealant. This section will guide you through Choosing the Right Sealant and the Application Process. Follow these steps to ensure a successful repair.
Choosing The Right Sealant
Not all sealants are the same. It’s crucial to pick a sealant that works for your tire type. Here are some tips:
- Ensure the sealant is compatible with your tire material.
- Look for a brand with good reviews and ratings.
- Check if the sealant is weather-resistant.
- Ensure it can seal high-pressure tires.
Using the right sealant makes the repair more effective and lasting. This step is critical for a safe and secure fix.
Application Process
Applying the sealant correctly is key to fixing the leak. Follow these steps:
- Clean the tire bead area thoroughly. Remove all dirt and debris.
- Shake the sealant bottle well before use. Ensure it is well-mixed.
- Apply the sealant evenly around the tire bead. Use a brush if needed.
- Inflate the tire to the recommended pressure. Ensure the sealant spreads evenly.
- Check for leaks by spraying soapy water on the bead area. Look for bubbles.
Follow these steps to ensure a tight seal. This will help prevent future leaks.
Reinstalling The Tire
Reinstalling the tire after fixing a bead leak is crucial. It ensures the tire fits properly and holds air. Follow these steps to get it right.
Proper Alignment
Before reinstalling, check the alignment of the tire. Proper alignment ensures the tire sits correctly on the rim.
- Place the tire on the rim carefully.
- Make sure the bead seats evenly around the rim.
- Use a tire lever to guide the tire if needed.
Ensuring A Secure Fit
A secure fit is essential for preventing future leaks. Use the following steps to ensure a tight fit:
- Apply a bead sealer around the rim.
- Press the tire firmly into place.
- Use a tire inflator to partially inflate the tire.
- Check that the bead is fully seated.
- Inflate the tire to the recommended pressure.
By following these steps, you will ensure a secure and leak-free tire.
Inflating The Tire
Fixing a tire bead leak requires precise inflation. Proper inflation ensures the tire seals correctly. Let’s walk through the process of inflating the tire.
Correct Inflation Levels
First, check the recommended pressure for your tire. You can find this information in your vehicle’s manual or on the tire sidewall. Use a reliable tire gauge to measure the current pressure.
| Vehicle Type | Recommended Pressure (PSI) |
|---|---|
| Car | 32-35 PSI |
| Truck | 35-40 PSI |
| Motorcycle | 30-40 PSI |
Ensure the tire is inflated to the recommended PSI level. Over-inflation or under-inflation can damage the tire.
Checking For Leaks
Once inflated, check for any leaks. Spray a solution of soapy water around the tire bead. Look for bubbles forming. Bubbles indicate a leak.
- Inflate the tire to the recommended level.
- Prepare a solution of soapy water.
- Spray the soapy water around the tire bead.
- Watch for bubbles forming.
If bubbles appear, the tire bead is still leaking. You may need to reapply a tire bead sealer.
Fixing a tire bead leak can be simple if done correctly. Always ensure the tire is properly inflated and check for leaks.
Preventive Maintenance
Proper preventive maintenance can stop tire bead leaks before they start. Regular checks and care keep your tires in top shape.
Regular Inspections
Conducting regular inspections of your tires is essential. Inspect for any visible damage or wear. Look for nails, glass, or other sharp objects. Check the tire pressure with a gauge. Low pressure can indicate a leak.
Inspect the tire bead area. Make sure it is clean and free of debris. Dirt can cause the bead not to seal properly. Clean the bead area with a brush if needed.
Tips For Longevity
- Rotate your tires every 6,000 miles.
- Keep your tires inflated to the recommended pressure.
- Avoid driving on rough or sharp surfaces.
- Balance your tires regularly to prevent uneven wear.
Follow these tips to extend the life of your tires. Well-maintained tires save money and keep you safe on the road.
Frequently Asked Questions
How Do You Seal A Leaky Tire Bead?
Clean the tire and rim thoroughly. Apply a bead sealer around the tire bead. Re-inflate the tire to the recommended pressure. Check for leaks using soapy water.
Can A Tire Bead Be Repaired?
Tire bead repair is not recommended. Damaged beads compromise tire safety and integrity. Replace the tire for optimal safety.
Does Tire Sealant Work For Bead Leaks?
Yes, tire sealant can work for bead leaks. It seals small gaps effectively, providing a temporary fix.
What Causes A Tire Bead Leak?
A tire bead leak is caused by damaged or corroded rims, improper installation, or debris between the tire and rim.
Conclusion
Fixing a tire bead leak is simple with the right tools and steps. Ensure you inspect the tire thoroughly. Use a proper sealant and check for any damage. Regular maintenance can prevent future leaks. Follow these tips to keep your tires in excellent condition and ensure a safe drive.


